Last updated: October 4, 2026
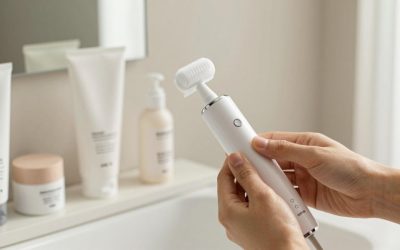
Learning how to replace facial cleansing brush heads is usually straightforward, but forcing the wrong attachment can damage the drive socket, loosen the brush mechanism, or leave bacteria trapped around the collar. A poorly seated head may also wobble, make unusual noise, or detach during use. The safest approach is to match the replacement to your exact device, remove the old head without twisting the handle, and clean and dry the connection before installing the new one.
This guide explains the process for common press-on and twist-lock facial cleansing brushes, including compatible replacement heads sold for Clarisonic-style devices. In 2026, replacement options vary by model and seller, so confirm the model number and attachment style before purchasing.
As an Amazon Associate we earn from qualifying purchases at no extra cost to you.

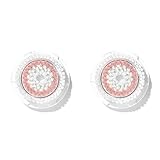
Quick answer: Our top pick in 2026 is the Correct replacement brush head — our #1 rated choice. See the full ranked comparison, alternatives and buying advice below.
What You Need
| Item | Why | Optional? |
|---|---|---|
| Correct replacement brush head | It must match the handle’s brand, model, attachment system, and intended use. | No |
| Clean, dry towel | Provides grip and prevents water from dripping into the exposed connection. | No |
| Warm water | Rinses cleanser and residue from the old and new head. | No |
| Mild, fragrance-free soap | Helps clean buildup around the collar if the head is difficult to remove. | Optional |
| Soft toothbrush or small cleaning brush | Dislodges dried product from grooves and the head socket. | Optional |
| Device manual or model number | Confirms compatibility, removal direction, and charging or cleaning limits. | Recommended |
Replacement heads are often inexpensive. For example, Deep Pore Brush Head Replacements for Clarisonic are listed at about $10, while an Evetree Radiance Facial Cleansing Brush Head Replacement two-pack compatible with Clarisonic Mia 1, Mia 2, Mia Fit, Alpha Fit, Smart Profile Uplift, and Alpha Fit is also listed at about $10. Prices commonly range from roughly $8 to $20 per pack, depending on the brand, bristle type, and number of heads included. Compatibility matters more than price.
Step-by-Step
1. Identify the device and replacement head (5 minutes)
Find the model name or number on the handle, charging base, packaging, or original manual. Then compare it with the replacement head’s compatibility list. Do not assume that two round brush heads use the same connector. Some heads press straight onto a post; others use tabs, slots, or a twist-lock collar.
Check the head’s purpose, too. Sensitive-skin, radiance, deep-pore, silicone, and exfoliating heads can have different textures and recommended pressure levels. If the replacement packaging lists a specific handle family, follow that list rather than relying on appearance alone.
2. Turn off and disconnect the device (1 minute)
Switch off the brush and remove it from its charging stand or magnetic charger. If the handle has a removable battery, follow the manufacturer’s instructions. Do not attempt to remove a head while the motor is running, and do not place a wet handle on a powered charging base.
Use the original charger or charging system supplied for the device. Avoid substituting a charger based only on connector shape or a similar-looking power rating; incorrect voltage can damage the handle or create a safety hazard.
3. Rinse and dry the connection area (2 minutes)
Rinse cleanser and makeup residue from around the brush head. Hold the brush head under lukewarm water, keeping the handle as dry as the manufacturer recommends. Wipe the outside of the collar with a clean towel, then grip the handle and head separately.
If product has hardened around the seam, apply a small amount of mild soap to a damp cloth and wipe the area. Never pry under the head with a knife, scissors, or metal tool. Sharp objects can scratch plastic, break locking tabs, or puncture a seal.
4. Remove the old brush head (1–3 minutes)
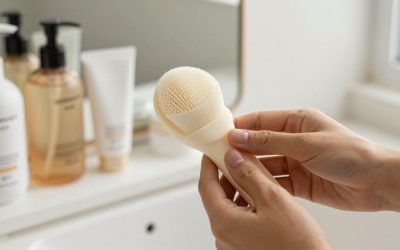
For a press-on head, pull the head straight away from the handle while holding the handle firmly. Use steady pressure rather than a sudden jerk. If the head resists, rock it very slightly from side to side without bending the connector.
For a twist-lock design, look for an arrow, open-lock symbol, or release mark. Turn the head in the indicated direction, usually a short quarter-turn, and then lift it away. Do not twist the handle itself or force the head past its stop.
If the head will not release after several gentle attempts, stop and consult the manual. A hidden release button or a different removal direction may be involved.
5. Inspect and clean the socket (2–5 minutes)
Look at the exposed drive post, connector, gasket, and surrounding collar. Remove hair, bristles, dried cleanser, and mineral residue with a soft toothbrush or damp cotton swab. Keep water out of openings and do not submerge the handle unless its instructions specifically allow it.
Check for cracked plastic, bent tabs, corrosion, or a loose drive post. A replacement head cannot correct a damaged handle connection. If you see damage, skip installation and review the “When to Call a Pro or Replace” section below.
6. Prepare the new head (1 minute)
Remove the replacement head from its packaging and inspect it for broken bristles, loose parts, or a warped collar. Rinse it with lukewarm water if the manufacturer recommends doing so before first use. Avoid boiling water, bleach, alcohol, and strong disinfectants unless the instructions specifically approve them; these can weaken bristles, seals, or plastic.
Match any tabs, grooves, arrows, or flat sides on the head with the corresponding features on the handle. The connector should look aligned before you apply pressure.
7. Install the replacement head (1–2 minutes)
Press a push-on head straight down onto the connector until it sits evenly and securely. Install a twist-lock head by aligning the marks, pressing it into place, and turning it only as far as the lock symbol indicates. You should not need excessive force.
Gently pull upward on the head to confirm that it is seated. It should not detach, tilt noticeably, or leave a large uneven gap around the collar. Do not add glue, tape, oil, or household lubricant. These substances may interfere with the motor, trap bacteria, or make later removal more difficult.
8. Test the brush briefly (1 minute)
Run the device for about 10 to 15 seconds while holding it away from your face. Listen for grinding, clicking, or a sudden change in motor pitch. Watch for excessive wobbling or a head that shifts off-center.
If the device sounds normal, wet the bristles and apply cleanser according to the handle’s instructions. Use light pressure; pressing harder does not make a cleansing brush more effective and can irritate skin. Rinse the head after use and store it in a clean, ventilated place.
Mistakes to Avoid
- Buying by appearance alone: Similar-size heads may use different connectors or motor interfaces.
- Forcing a mismatched head: Excess pressure can crack the collar or damage the drive post.
- Twisting a press-on head: Pull it straight off unless the manual identifies a locking motion.
- Installing while wet: Water around the connection can encourage residue buildup and may reach electrical components.
- Using very hot water: High heat can deform plastic and weaken adhesives or seals.
- Ignoring bristle texture: A deep-pore or exfoliating head may be too aggressive for daily use or sensitive skin.
- Sharing one head: Each user should have a separate head, even when the handle is shared.
- Skipping the test run: A loose head can wobble or detach before you notice it on your face.
How Often
Replace the brush head about every three months as a general starting point, or sooner if the bristles become bent, rough, discolored, flattened, or difficult to clean. Heavy daily use, oily products, makeup residue, and storage in a constantly damp shower can shorten that interval. Some manufacturers recommend different schedules, so follow the instructions supplied with your particular head.
Rinse the head after every use and shake off excess water. Once or twice a week, wash it more thoroughly with mild soap, rinse well, and let it air-dry completely. Do not store it inside a sealed travel case while damp. If you develop skin irritation, stop using the head and replace it after identifying whether the issue is pressure, cleanser, or bristle texture.
When to Call a Pro or Replace
Most brush-head changes do not require professional service. Contact the manufacturer or an authorized repair provider if the connector is cracked, the drive post is loose, the handle overheats, the device smells like burning plastic, or water has entered the handle. Stop using it immediately if it sparks, shocks you, or repeatedly turns on and off.
Replace the handle rather than just the head when the motor remains noisy with a known-compatible replacement, the battery will not hold a practical charge, or the attachment mechanism no longer locks securely. A loose head can detach during use and may indicate worn internal parts.
FAQ
Can I use any replacement brush head on my facial cleansing device?
No. Match the brand and exact model family whenever possible. Confirm the connector style, head diameter, and compatibility list before buying. A head that fits physically may still fail to engage the motor correctly.
Why will my new brush head not click into place?
Check that the head is facing the correct direction and that no packaging film, hair, or cleanser is blocking the socket. Verify whether your device uses a press-on or twist-lock attachment. If it still does not seat with gentle pressure, it may be incompatible or the handle connector may be damaged.
Is it normal for a replacement head to wobble slightly?
A tiny amount of movement can occur on some designs, but visible wobbling, clicking, scraping, or uneven rotation is not normal. Turn the device off, remove the head, clean the connection, and reinstall it. If the problem continues, stop using that head.
Can I clean a facial cleansing brush head with rubbing alcohol?
Only if the manufacturer specifically permits it. Rubbing alcohol can dry or weaken certain plastics, bristles, and seals. Warm water, mild soap, thorough rinsing, and complete air-drying are the safer default methods.
Ready to decide? Our #1 pick for 2026 is the Correct replacement brush head.
Live price & availability on Amazon.