Last updated: October 4, 2026
An electric cleansing brush can collect facial oil, makeup, cleanser residue, dead skin, and moisture in places you may not notice: between silicone ridges, around bristles, beneath a brush head, or near the charging contacts. If you simply rinse the device and put it away wet, bacteria and mildew can build up, odors can develop, and residue may transfer back to your skin. Water can also enter the motor housing or charging port, causing corrosion or an electrical fault.
Learning how to clean an electric cleansing brush takes only a few minutes, but the method matters. The safest routine is to remove the detachable head when possible, wash the skin-contacting surface with mild soap, disinfect only as directed by the manufacturer, and dry every part completely before charging. The steps below work for rechargeable silicone scrubbers and sonic brushes, including budget-friendly options such as the roughly $10 PRITECH Facial Cleansing Brush and the approximately $16 Conair True Glow Sonic Facial Cleansing Brush.
As an Amazon Associate we earn from qualifying purchases at no extra cost to you.
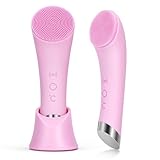

Quick answer: Our top pick in 2026 is the Lukewarm water — our #1 rated choice. See the full ranked comparison, alternatives and buying advice below.
What You Need
| Item | Why | Optional? |
|---|---|---|
| Lukewarm water | Loosens cleanser, oil, and makeup without stressing seals or delicate materials. | No |
| Fragrance-free liquid soap or gentle facial cleanser | Breaks down skin and product residue without harsh solvents. | No |
| Soft, clean toothbrush or small detailing brush | Reaches grooves, bristle bases, seams, and charging-stand crevices. | Yes |
| Clean microfiber towel or lint-free cloth | Dries the brush without leaving fibers behind. | No |
| Cotton swabs | Wipes around buttons, contacts, ports, and narrow edges. | Yes |
| 70% isopropyl alcohol | Useful for wiping nonporous exterior areas or charging contacts when the manual permits it. | Yes |
| Small bowl | Holds soapy water for cleaning a removable head separately. | Yes |
Before cleaning, unplug the charger and turn the device off. Never immerse the handle unless the instructions specifically say the entire unit is submersible. “Waterproof” generally applies to normal use around water, not necessarily to prolonged soaking, boiling water, or submersion while charging.
Step-by-Step
1. Check the manual and remove the head (1 minute)
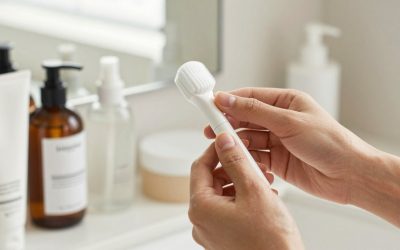
Look for the device’s cleaning and water-resistance instructions. Identify which components detach: some brushes have a removable silicone head, while others use a replaceable bristle attachment. Pull or twist the head off using the method shown in the instructions rather than forcing it. Removing it exposes the underside, where cleanser and moisture often collect.
If the brush head does not detach, do not pry it loose. Clean the assembled unit while keeping water away from the power button, seams, charging port, and contacts.
2. Rinse away loose residue (30 seconds)
Hold the detachable head under lukewarm running water. Move your fingers across the silicone nubs or bristles to loosen visible residue. If the brush was used with waterproof makeup, sunscreen, or a thick cleansing balm, rinse for a little longer. Do not use hot water; high heat may soften adhesives, distort plastic, or damage seals over time.
For the handle, dampen a cloth instead of holding the entire body under the faucet unless the manufacturer clearly permits that type of rinsing.
3. Wash with mild soap (1 to 2 minutes)
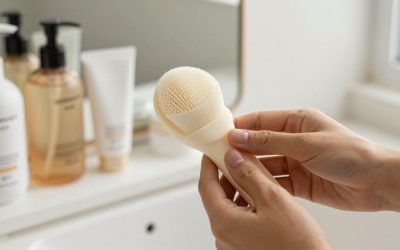
Place a pea-sized amount of fragrance-free liquid soap or gentle facial cleanser on the wet head. Work the cleanser into every groove, edge, and bristle base with your fingers. A clean, soft toothbrush can help with textured silicone or densely packed bristles, but use light pressure.
Wipe the handle with a soapy, damp cloth, concentrating on the area around the power button and the joint where the head attaches. Avoid abrasive powders, stiff brushes, bleach, acetone, essential oils, and concentrated household cleaners. These may dull silicone, irritate skin, or damage the finish.
4. Clean the underside and charging area (1 minute)
Rinse the head again and inspect the underside. Remove any film from the attachment socket, retaining ring, or seam. Use a damp cotton swab or detailing brush for narrow spaces, then wipe the area with a clean cloth.
For charging contacts, use a nearly dry cotton swab. If the instructions allow alcohol, lightly dampen the swab with 70% isopropyl alcohol and wipe the contacts once. Do not pour alcohol into a port, flood the area, or reconnect the charger until all traces of moisture have evaporated.
5. Rinse until no cleanser remains (30 to 60 seconds)
Rinse the removable head under lukewarm water until the water runs clear and the surface no longer feels slippery. Soap left behind can attract dust and may irritate your skin during the next use. If the handle was wiped with soap, use a separate damp cloth to remove the residue, then follow with a dry cloth.
6. Dry every component completely (at least 30 minutes)
Shake excess water from the head and pat it dry with a clean microfiber towel. Set it upright or on its side in a well-ventilated location so air can reach the underside. Leave the head detached from the handle whenever possible.
Keep the device away from a closed drawer, damp shower ledge, or sealed toiletry bag while it dries. Wait at least 30 minutes before charging, and longer if water remains around the attachment point or port. Do not use a hair dryer, radiator, or direct high heat.
7. Clean the stand and store safely (1 to 2 minutes)
Wipe the charging stand with a damp cloth, then dry it completely. Pay attention to the base, cable connection, and any recessed areas that can hold water. Place the dry brush in an open, clean location. Avoid storing it bristle-down in a puddle or inside a closed container.
Once a week, inspect the head for discoloration, odor, cracks, loosened bristles, or a tacky texture. These signs indicate that routine washing may no longer be enough.
Mistakes to Avoid
- Soaking the whole device: Even water-resistant models can be vulnerable at seams, buttons, and charging ports.
- Cleaning while plugged in: Unplug the charger before the brush touches water.
- Using boiling water or bleach: Heat and strong chemicals can damage silicone, plastic, adhesives, and skin-contact surfaces.
- Sharing a brush head: Each user should have a separate head, especially when dealing with acne, cold sores, or an active skin infection.
- Skipping the underside: The hidden attachment area can hold more residue than the visible surface.
- Putting it away wet: Trapped moisture encourages odor and microbial growth.
- Using a dirty detailing brush: A brush used for makeup or household cleaning can transfer oils and bacteria.
- Charging before it is dry: Moisture near electrical contacts can cause corrosion or malfunction.
How Often
Rinse and wash the skin-contacting head after every use. If you use the brush with makeup, sunscreen, oil cleanser, or a creamy product, perform the full soap-and-rinse routine immediately rather than waiting until the end of the day.
Wipe the handle and charging stand at least once a week, or more often if they become visibly dirty. Give the attachment socket and underside a detailed cleaning weekly. Replace or wash a removable head according to its manual; many bristle heads need replacement every few months, while silicone heads may last longer if they remain intact and odor-free.
If more than one person uses the device, clean it between users and provide separate heads. Cleaning does not make sharing a head a good choice for people with sensitive or compromised skin.
When to Call a Pro or Replace
Stop using the brush if it shocks, overheats, smells like burning plastic, makes an unusual grinding sound, swells, or will not charge normally. Do not open a rechargeable handle yourself; contact the manufacturer or an authorized repair service if the product is under warranty. A damaged lithium battery can be a fire risk.
Replace the brush head when it has cracks, torn silicone, permanently bent bristles, a persistent odor after cleaning, peeling material, or a rough edge that scratches your skin. Replace the entire device if water has entered the display or charging port, the housing is cracked, or the power button behaves unpredictably. A low purchase price, such as approximately $10 to $16 for some basic models, is not a reason to keep using an electrically damaged device.
FAQ
Can I use rubbing alcohol on an electric cleansing brush?
Only use it on nonporous exterior areas or charging contacts if the manufacturer permits it. Do not soak silicone, flood buttons, or apply alcohol to a surface that the instructions say to clean with soap and water only. Always let the device dry fully before use.
Can I clean the brush with facial cleanser?
Yes, a gentle facial cleanser can remove everyday residue from a silicone head or bristles. Rinse thoroughly afterward. Avoid exfoliating cleansers containing scrub particles, which can lodge in textured surfaces or create unnecessary wear.
Why does my cleansing brush still smell after washing?
A lingering smell usually means residue or moisture remains beneath the head, around the attachment socket, or inside a porous bristle bundle. Detach the head, clean the underside, and air-dry both pieces separately. If the odor remains after two thorough cleanings, replace the head.
Can I put an electric cleansing brush in the dishwasher?
No, unless the manufacturer specifically states that a particular removable component is dishwasher-safe. Dishwasher heat, detergent, and strong water pressure can deform parts and damage seals. Hand-washing with lukewarm water and mild soap is the safer default.
Ready to decide? Our #1 pick for 2026 is the Lukewarm water.
Live price & availability on Amazon.