Last updated: September 27, 2026
Facial rollers, whether jade, rose quartz, stainless steel or other stone, are among the gentlest skincare tools you can own. They will not change the structure of your face, but used correctly they can reduce morning puffiness, help serums spread evenly, and turn a routine into a relaxing few minutes. Used incorrectly, with too much pressure, dragging over dry skin, or rolling over active breakouts, they can irritate skin or spread bacteria. This guide explains the correct technique, direction and hygiene for using a facial roller, whichever material you own.
What a facial roller can and cannot do
Gentle rolling may help move fluid that collects overnight, reducing puffiness around the eyes and cheeks temporarily. A chilled roller adds a cooling effect that constricts surface blood vessels briefly. Rolling also helps distribute serums and oils evenly. It does not burn fat, permanently slim the face, or remove wrinkles. Any sculpting effect is temporary, usually lasting hours.
Preparing the roller and skin
Clean the roller first
Wipe the stones or metal with a mild soap and water or a wipe recommended by the manufacturer. Dry completely. Alcohol can be used on stainless steel; natural stone may become dull or damaged by repeated harsh chemicals, so follow the maker’s guidance.
Chill it, optionally
Store the roller in the fridge for extra depuffing. Avoid the freezer for stone rollers, as extreme cold may crack stone and can be too cold for sensitive skin.
Apply slip
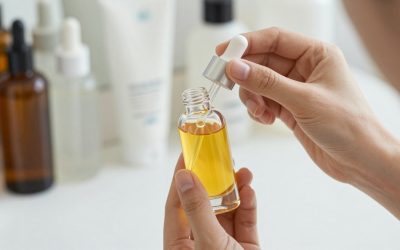
Roll over a serum, facial oil or moisturizer rather than dry skin. Slip prevents tugging and helps the roller glide.
Step-by-step technique
1. Start at the neck
Roll gently downward from under the jaw toward the collarbone on each side. Many practitioners begin here to encourage drainage toward lymph nodes in the neck.
2. Jawline
Roll from the center of the chin outward along the jawline to the ear, five to ten times per side.
3. Cheeks
Roll from the side of the nose outward toward the ear, working in rows from the lower cheek to the upper cheekbone.
4. Under-eyes
Use the small end of the roller, with very light pressure, from the inner corner outward toward the temple. Avoid pressing on the eyeball or pulling the lower lid.
5. Forehead
Roll from the brows upward toward the hairline, then from the center outward to the temples.
6. Finish
Continue your routine with moisturizer and, in the morning, sunscreen.
Pressure, time and frequency
| Area | Pressure | Strokes per area | Roller end |
|---|---|---|---|
| Neck | Light | 5-8 downward | Large |
| Jawline | Light to medium | 5-10 outward | Large |
| Cheeks | Light to medium | 5-10 per row | Large |
| Under-eyes | Very light | 3-5 outward | Small |
| Forehead | Light | 5-8 upward | Large |
A full routine takes about three to five minutes and can be done daily. Many people prefer mornings, when puffiness is most visible.
When not to roll
Skip rolling over active acne, open wounds, cold sores, sunburn, rosacea flares or any rash. Rolling can spread bacteria and increase inflammation. Avoid rolling right after chemical peels, microneedling or laser treatments until your provider says it is safe. People with very sensitive skin or visible broken capillaries should use the lightest pressure.
Keeping the roller hygienic
Clean after every use and let it dry completely before storing in a clean pouch or box. Check the frame regularly; squeaking or wobbling stones may mean the metal pins are loosening. Replace the roller if the frame rusts or the stone chips, as rough edges can scratch.
Choosing a material, briefly
Jade and rose quartz are traditional and stay cool for a short time. Stainless steel stays cold longer, is easy to disinfect and will not crack if dropped. The technique is the same for all materials.
FAQ
Should I roll up or down on my face?
Most techniques use outward strokes on the face and downward strokes on the neck. The key is gentle, consistent movement rather than a strict single direction.
Can I use a facial roller with retinol?
It is better to roll with a simple serum or moisturizer. Rolling over a retinoid may increase penetration and irritation for some people.
Bottom line
To use a facial roller correctly, clean it, apply slip, work outward on the face and downward on the neck with light pressure, and keep sessions to a few relaxing minutes. Skip broken or inflamed skin, clean the roller after each use, and enjoy it for temporary depuffing rather than permanent change.